Hydratight Setup
New System Setup
Settings
Settings
For new setups, start with the latest ini located here: M:\Production\Customer Backups\Hydratight_OEM\_Production Information\Master Control Files\Mach4 V2.0
Then run the standard Mach4 MachMotion Installer over the old ini.
For the spindle drive, use X15-02-25 and follow this document: https://support.machmotion.com/books/mm-production/page/x15-02-25-yaskawa-analog-and-digital-control-%28velocity-and-position%29 .
Drive Setup
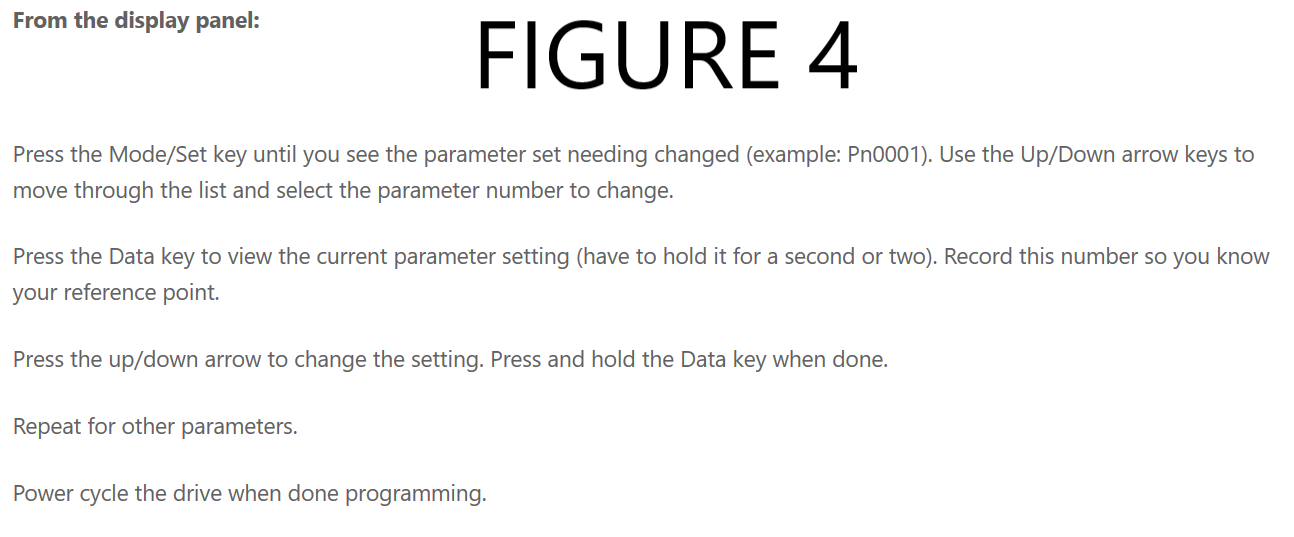
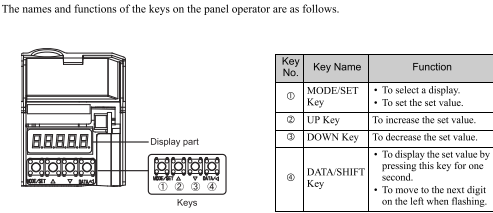
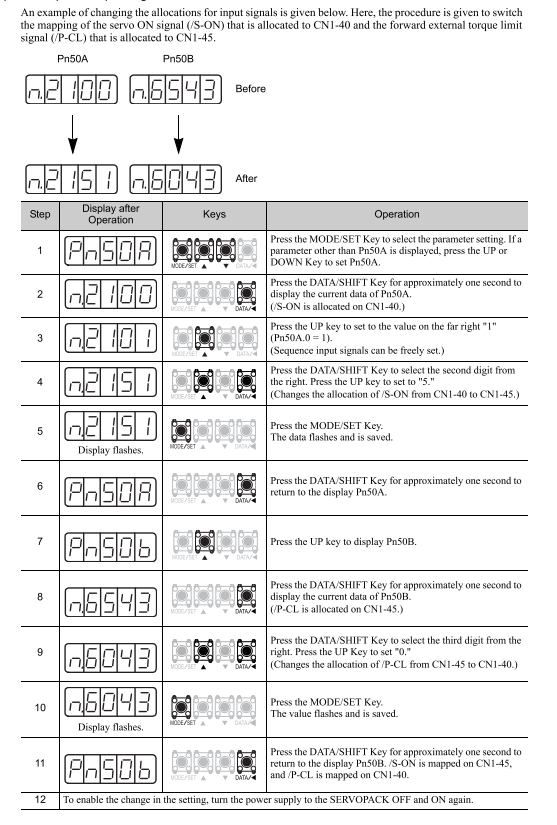
Next you will have to change the 1Pn50A parameter in the X,Y,Z drives. If you open the black door on the front of each drive you will see 4 buttons. Machmotion will help if needed. Just ask
FIGURE 4 Will help you set this parameter. Set Pn50A to 8021
Spindle Disable Feature
Wiring (Done by default on standard systems)
Follow these steps to update an existing machines wiring:
Turn off Power Supply and open the cabinet.
- need
FIGURE 1. Locate the 5CR relay located in the blue relay bank in the middle of the enclosure.
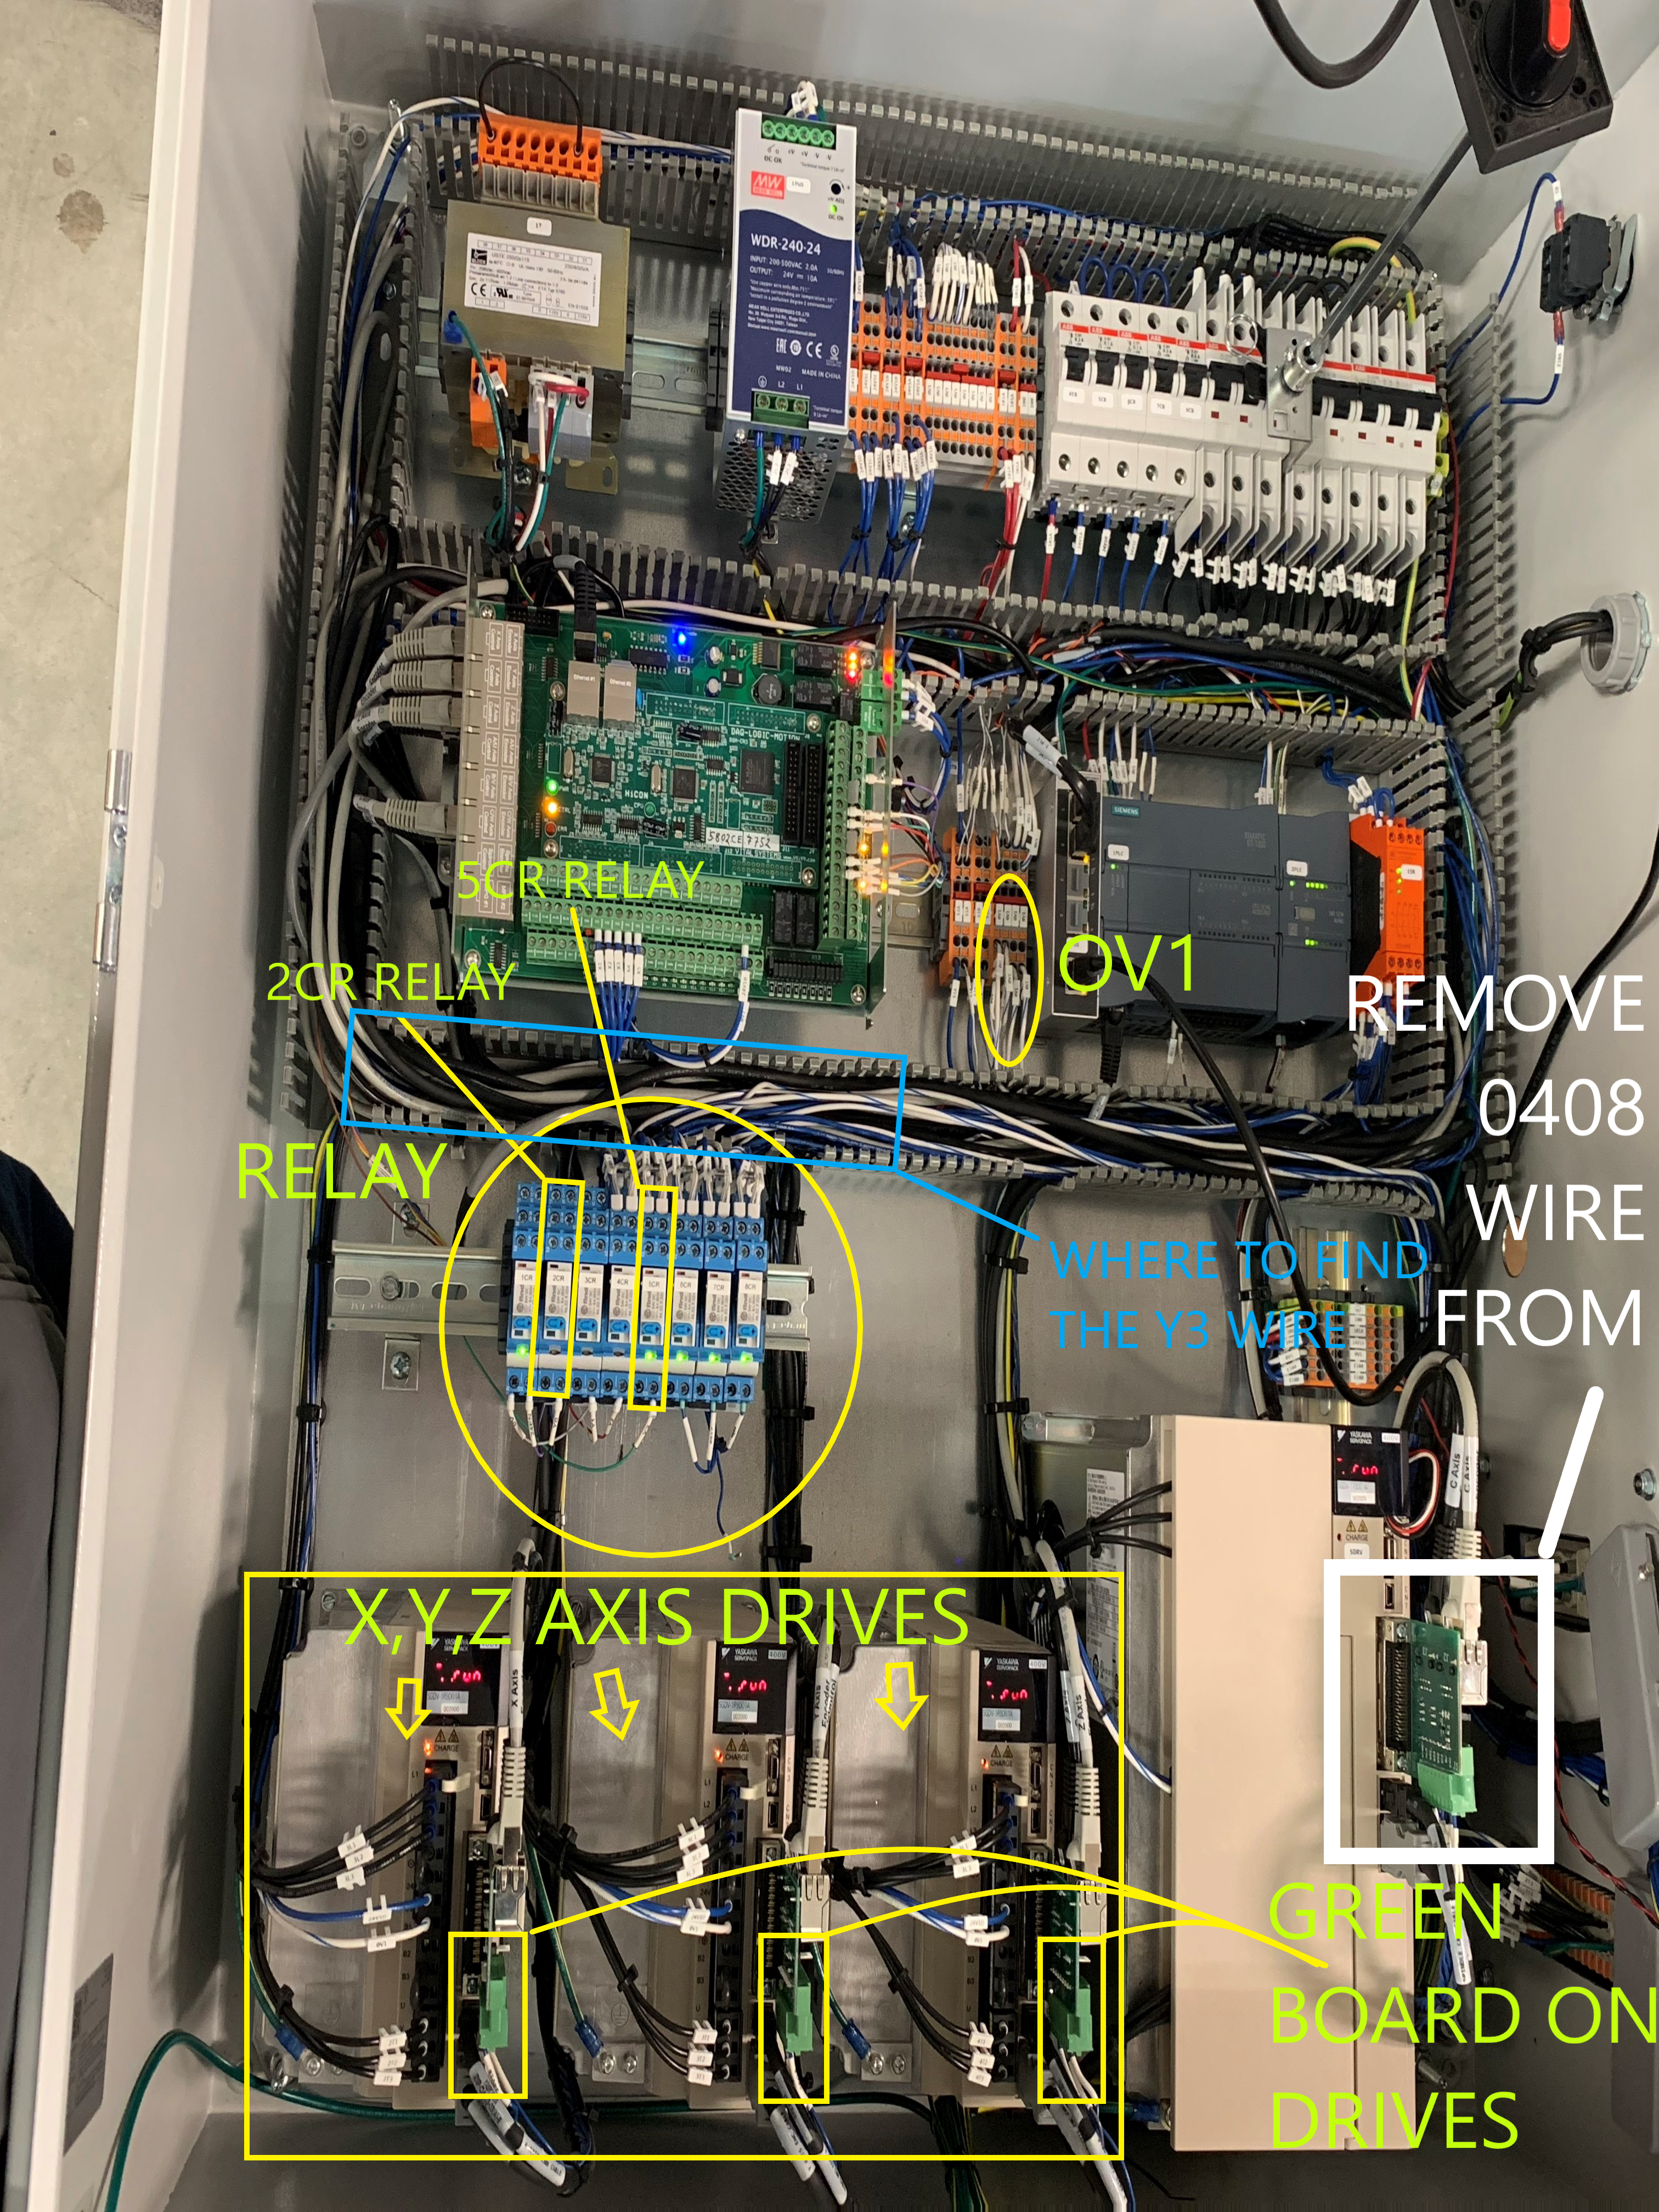
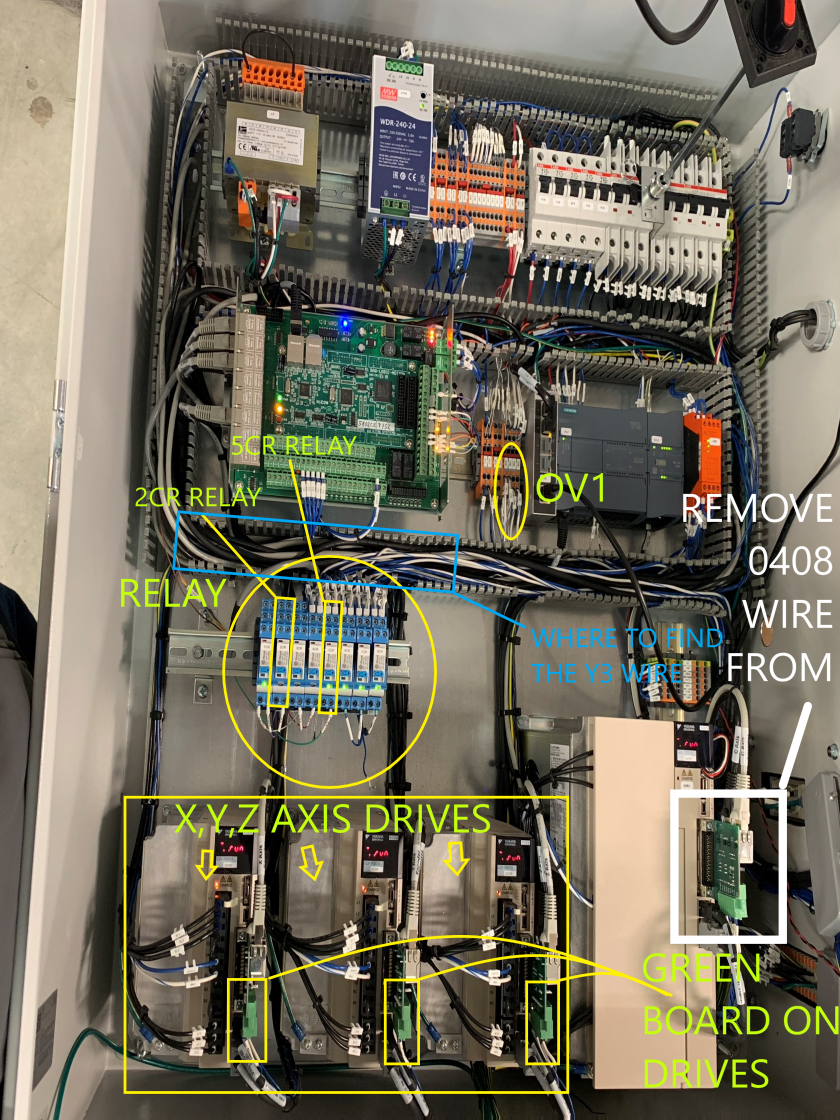
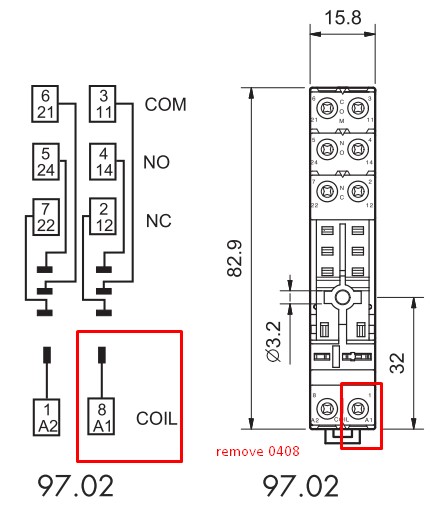
FIGURE 2 Remove the 0408 wire coming into the bottom of the relay. FIGURE 1 (Shown in White on Figure 1) Also,to remove the 0408 wire from the 5CR relay and the VFD.
-
- There is a green circuit board on the front of the
CVFDservoanddrive.you(Sijad-need to remove thesame0408 wireyou removedfrom thelastS03timeportafteronIthatleft.)board.Then,heat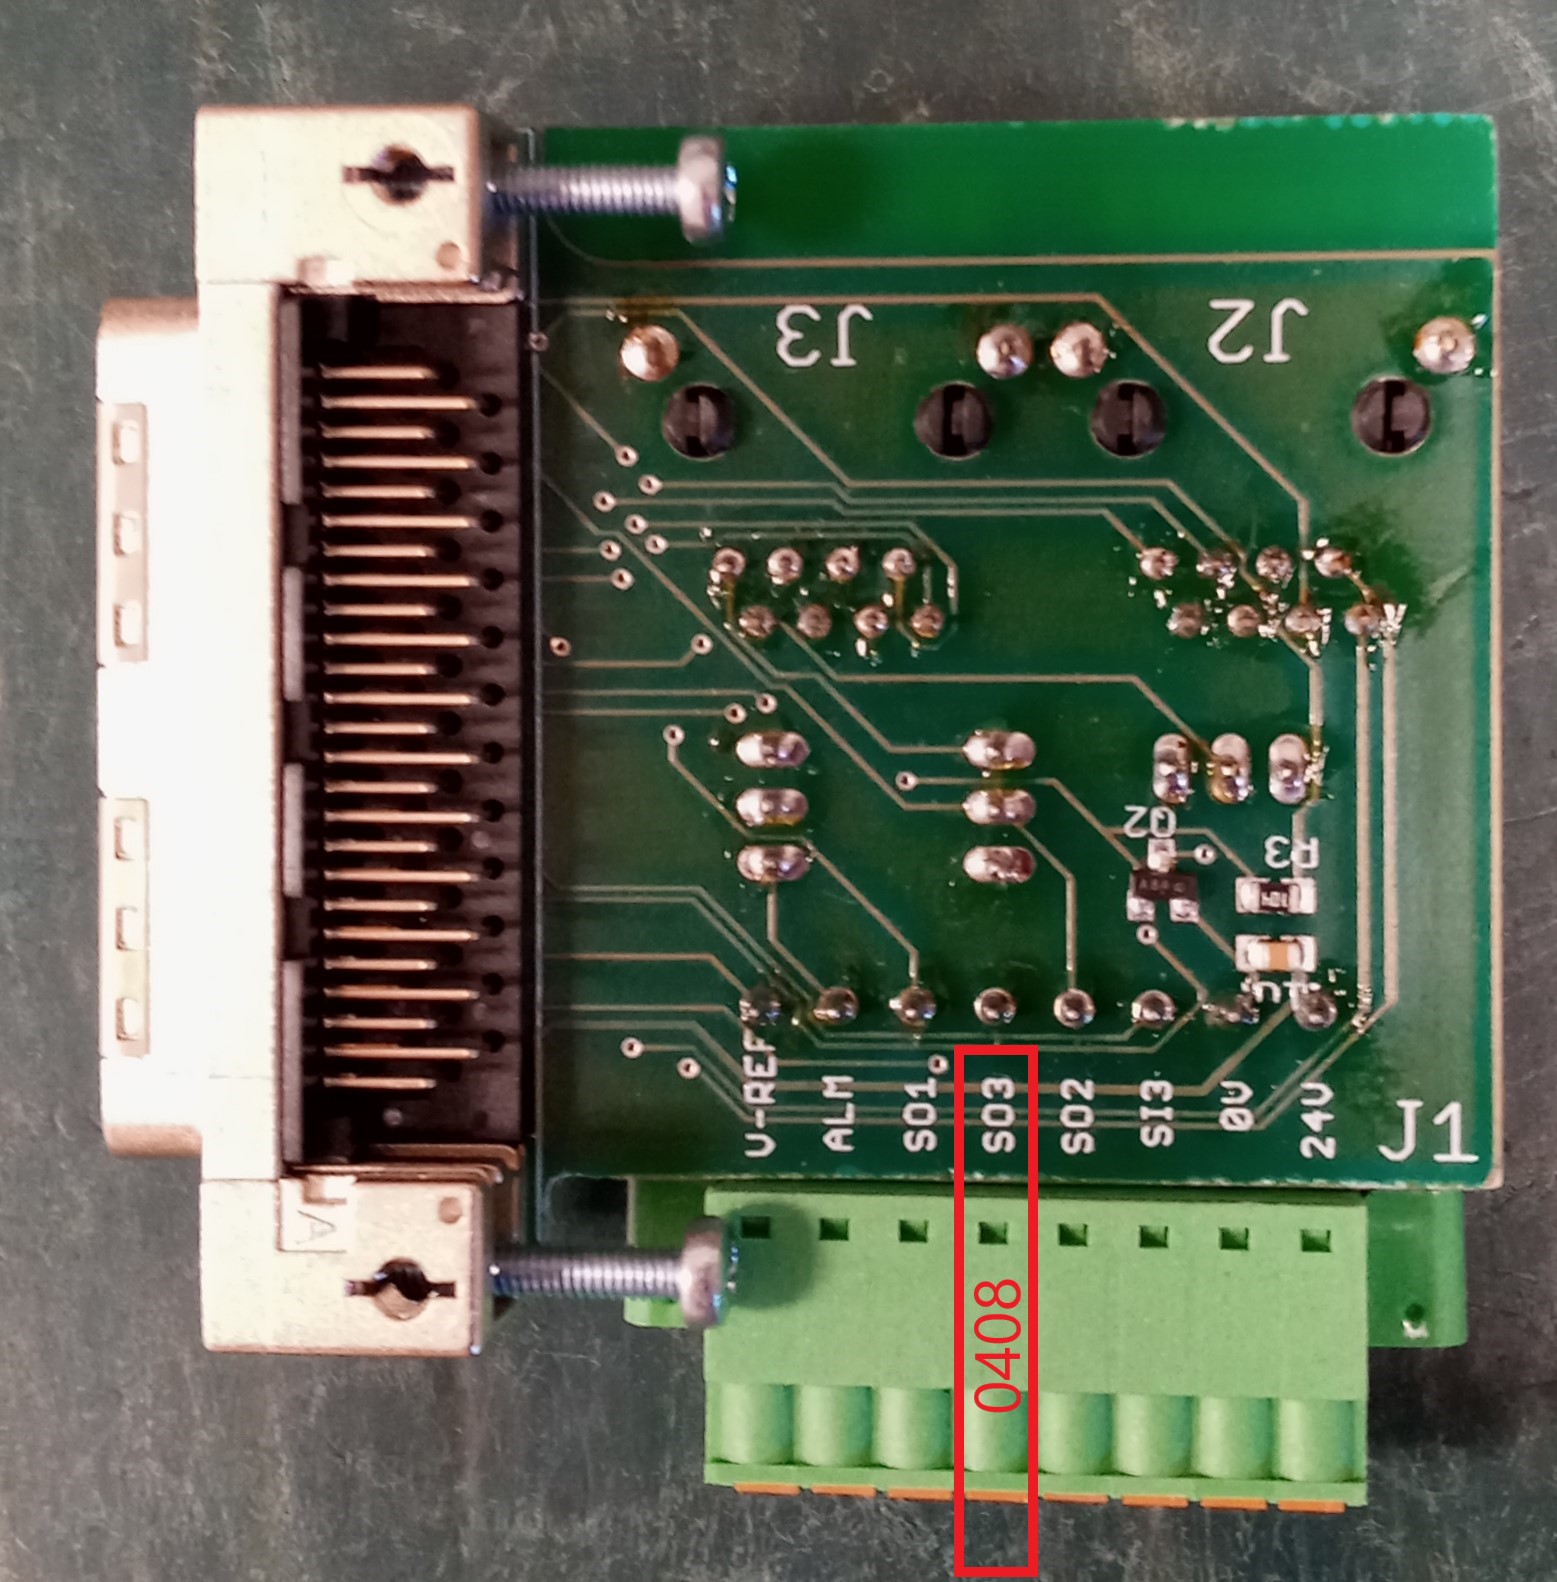
-
You need to remove the other end of the 0408 wire from the A1 port on the bottom of the 5CR relay.
-
Heat shrink
orbothtapeofboththe exposed ends of the 0408 wire to prevent it from shorting out.
- There is a green circuit board on the front of the
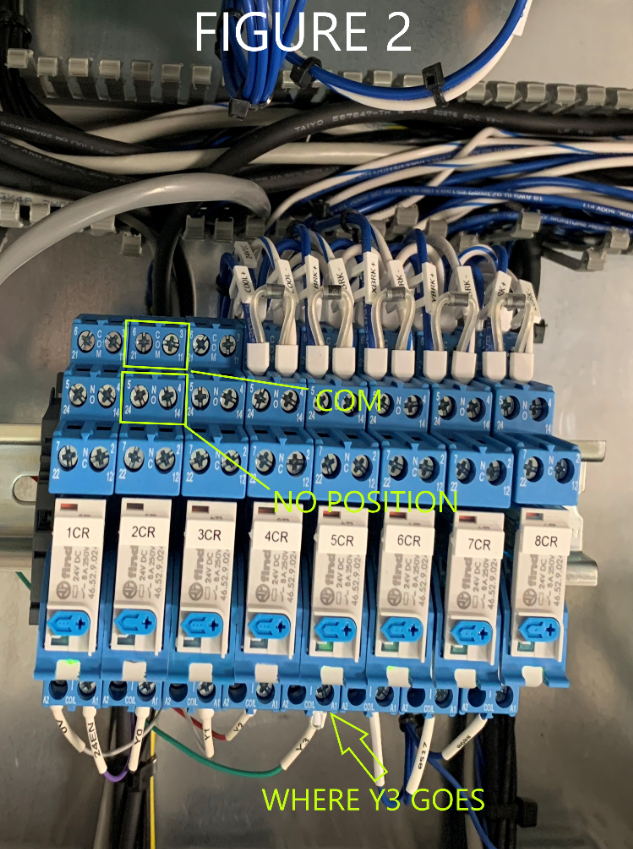
FIGUREis1aNext,bundlelocateof Yn wires coming from the Apollo motion controller down to the relay bank. Locate the Y0, Y1,Y2Y2, wiresinthat connect into therelaysbluenextrelays,toand5cr. Followfollow them back into the cable tray.ThereOpenareupmorethe shrink wrapped bundle of Yn wirestucked into cable tray. You will haveto expose the unused leads.- Locate Y3 and remove any heat shrink
and locateprotecting theY3contact. - Connect Y3
wire, you will havetoheat shrink or tapetheendsA1 port on the bottom of theremaining5CRwiresrelay.againto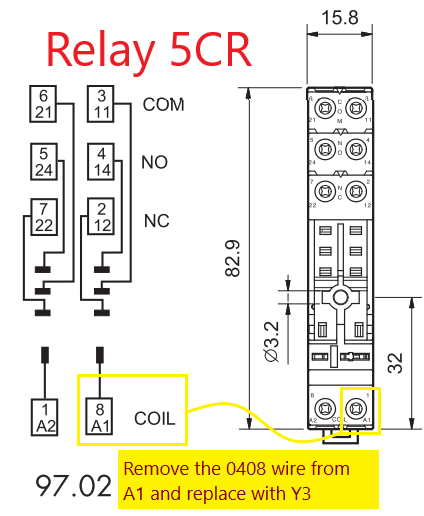
prevent - Re-protect the
wiresremainingshortingunusedout,Ynifleadstheywithareshrinknotwrapalreadytubing,heatandshrinked.place them back into the cable tray.
wire. After findingFIGURE 2 Put the Y3 wire where the 0408 wire was in the bottom on 5CR relay.
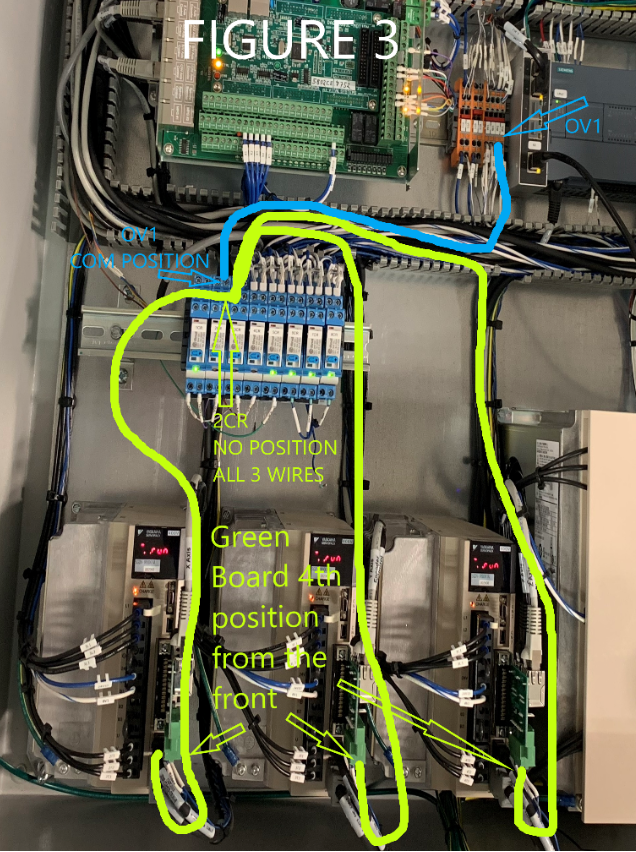
FIGURE 1Next locate the green I/O board on the X axis, Y axis, and Z axis drives.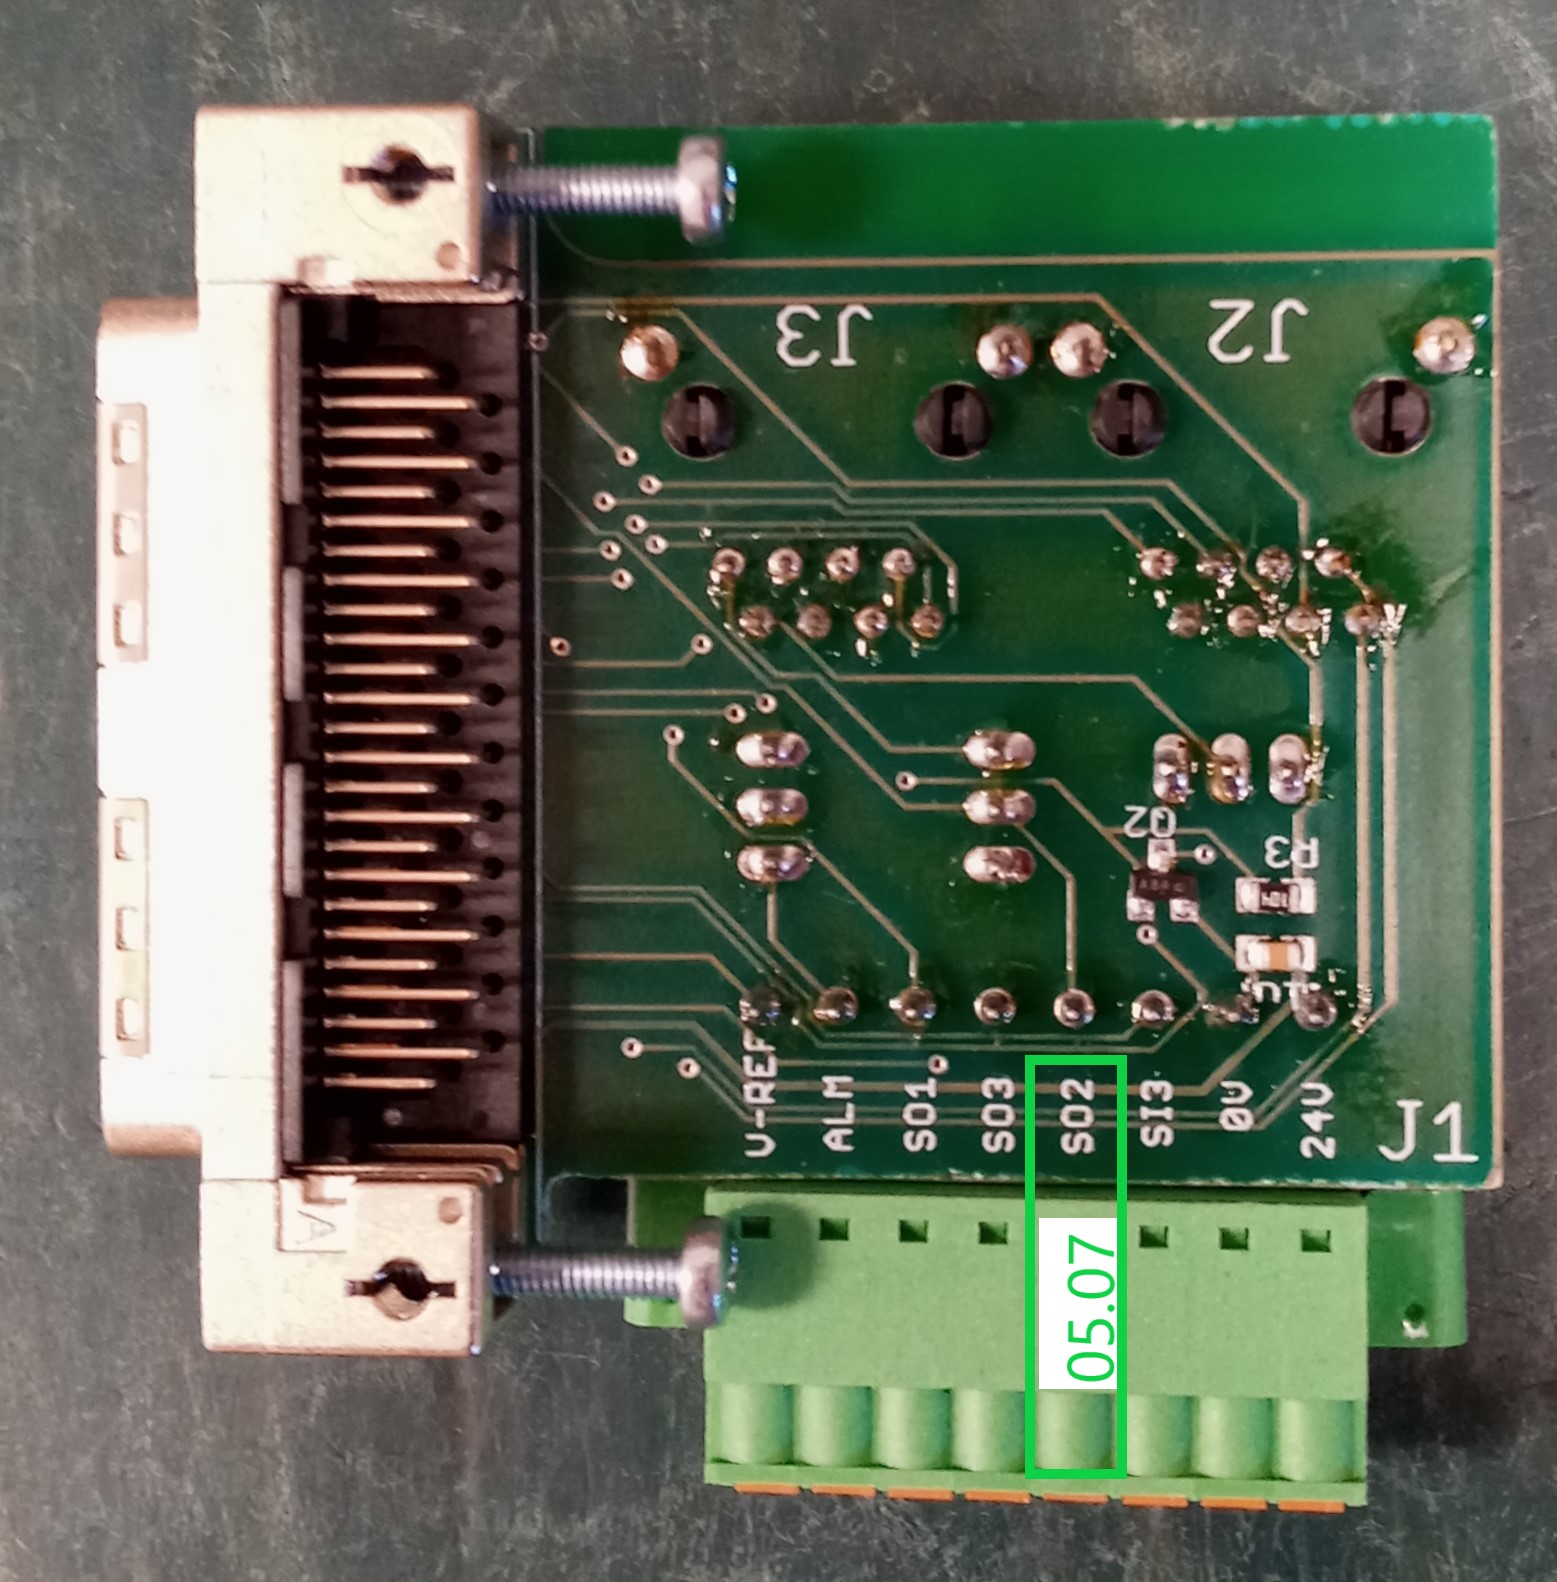
FIGURE 3 (Shown in Yellow on Figure 3) Next, runRun a new wire (22awg or.6438mm)0.64mm) from each of the 3 drives to the 2CR relay.4thwireS02 positionfrom the frontofon the greenboard.boards. All three wires from the drives can go together into the top ofrelay2CR(userelay. Use theNONormally Open (NO) position. Label those wires 05.07 on all ends.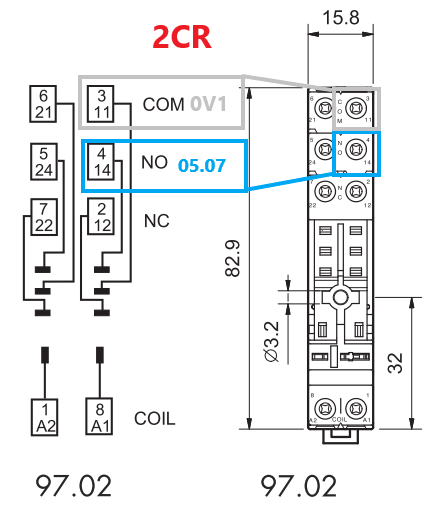
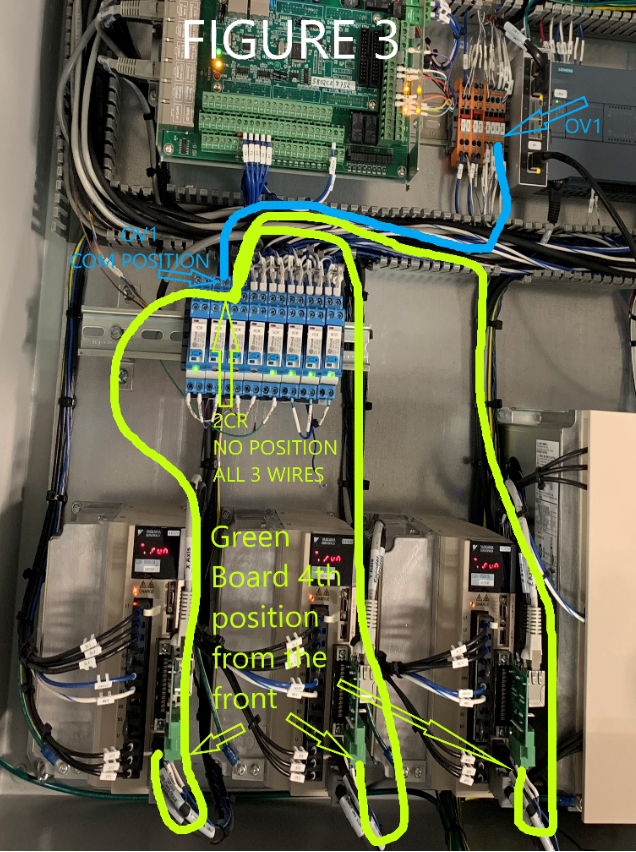
FIGURERun3a(Shown in blue on Figure 3) Next run anothernew wire (22awg or.6438mm)0.64mm) from the 0V1 wire block to the COM position on the top of2CR (use the COM terminal) to the OV1 wire block.2CR. Label both ends OV1.
9.Finally, follow the drive setup as shown above.Software Changes
To enable this on an existing machine, follow the procedure below.
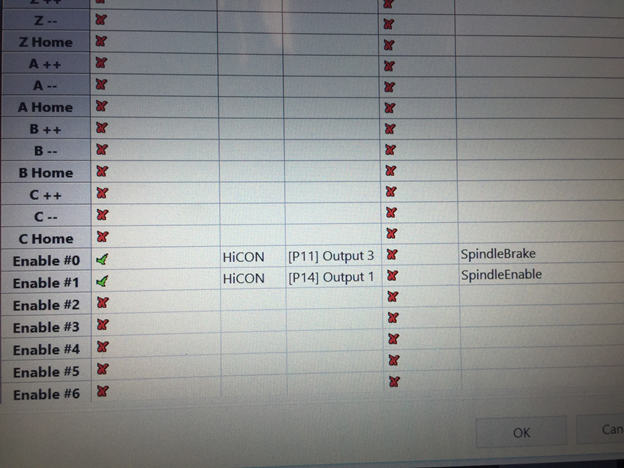
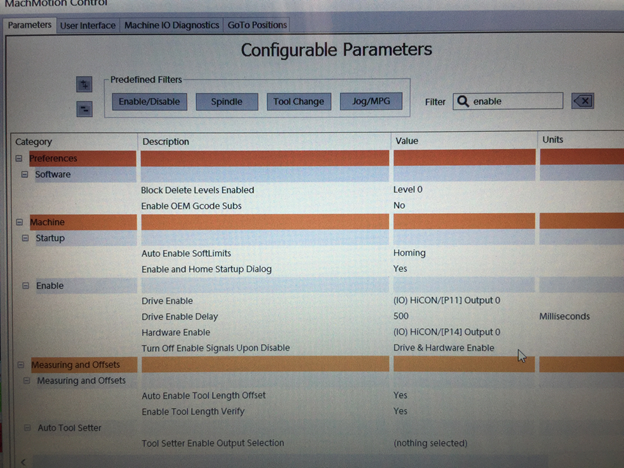
Set up enable signals as shown.
What is actually going on here is Y3 is wired to the Brake so Mach4 can control it separately from the drive. Port 14 output 1 or what is normally drive enable is ONLY used for Spindle Enable.
Unmap coolant On and disable it.
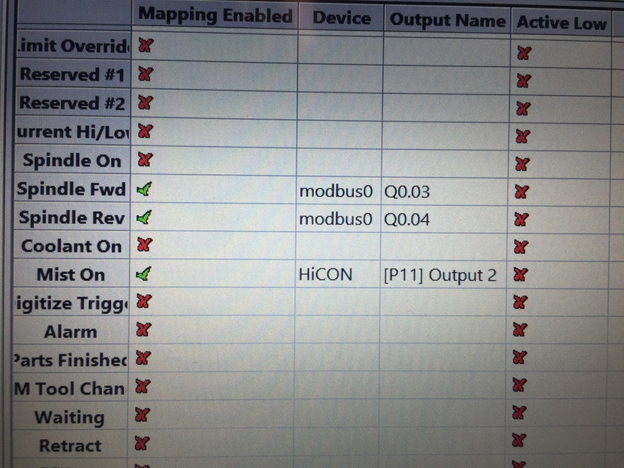
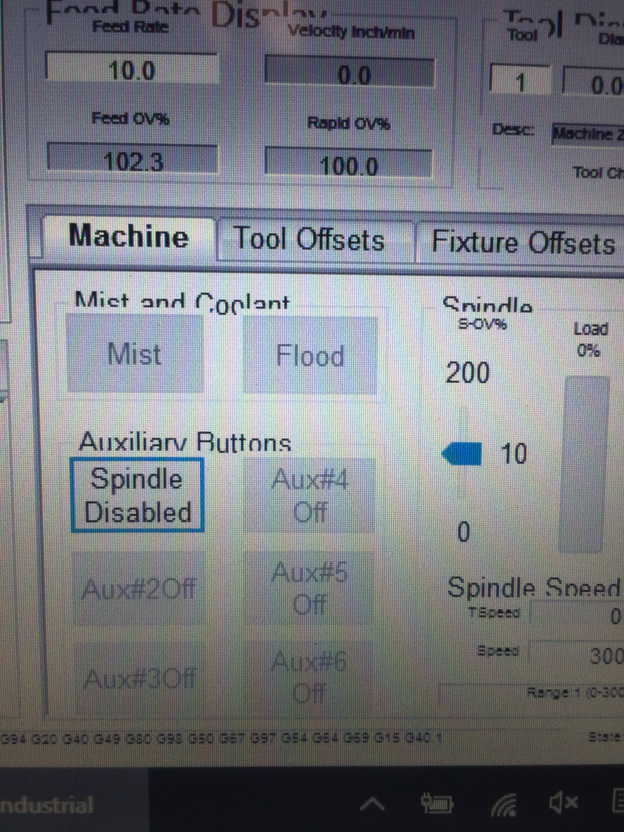
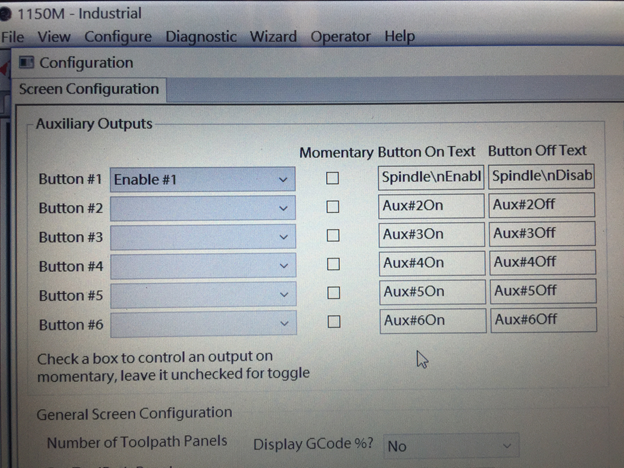
Setup Drive Enable as shown under Machine->Enable.
- Locate Y3 and remove any heat shrink
There