How to properly assemble and torque bolts, motors and gearboxes
The following information was taken from Nidec's "Installation Instructions and Safety Precautions" page. For Inline and Right angle planetary products - VR/EV series. It is the consensus that this information would be used for all brands unless otherwise note
Clean the motor shaft and the inner passage of the clamping collar. Lacquer Thinner is best but any solvent to remove the residual oils or the thicker rust preventative is fine.
PRO-TIP: I find it helpful to line up the collar bolt with the access hole prior to inserting the motor shaft into the gearbox clamp collar.
IMPORTANT: THE (4) MOTOR TO GEARBOX BOLTS MUST BE TIGHTED FULLY BEFORE THE GEARBOX CLAMP BOLT CAN BE TIGHTEND !!
Set Torque Wrench to appropriate setting for the bolt to be tightened. Be sure to identify the correct torque measurement (in-lbs, ft-lbs, Nm) .
Tighten each bolt with the torque wrench until a "click" is heard/felt (typically a second click is done for added assurance that the torque setting was met). Mark each bolt to indicate torquing has been done (paint pen works the best)
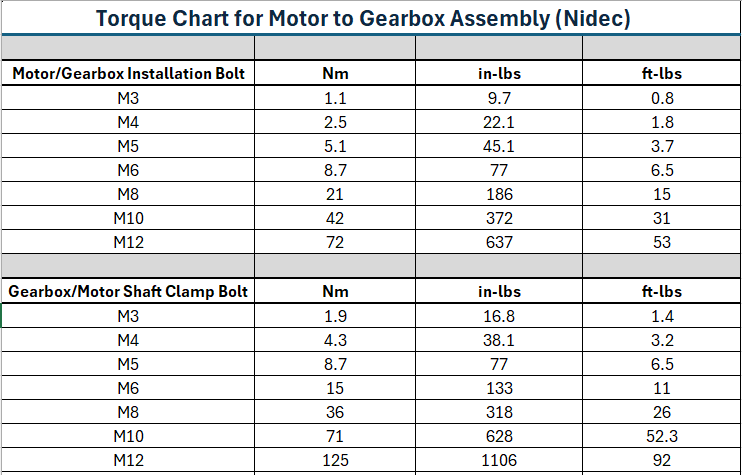
See Torque Chart below: Note the different torques for the motor/gearbox bolts and the gearbox clamp bolts.

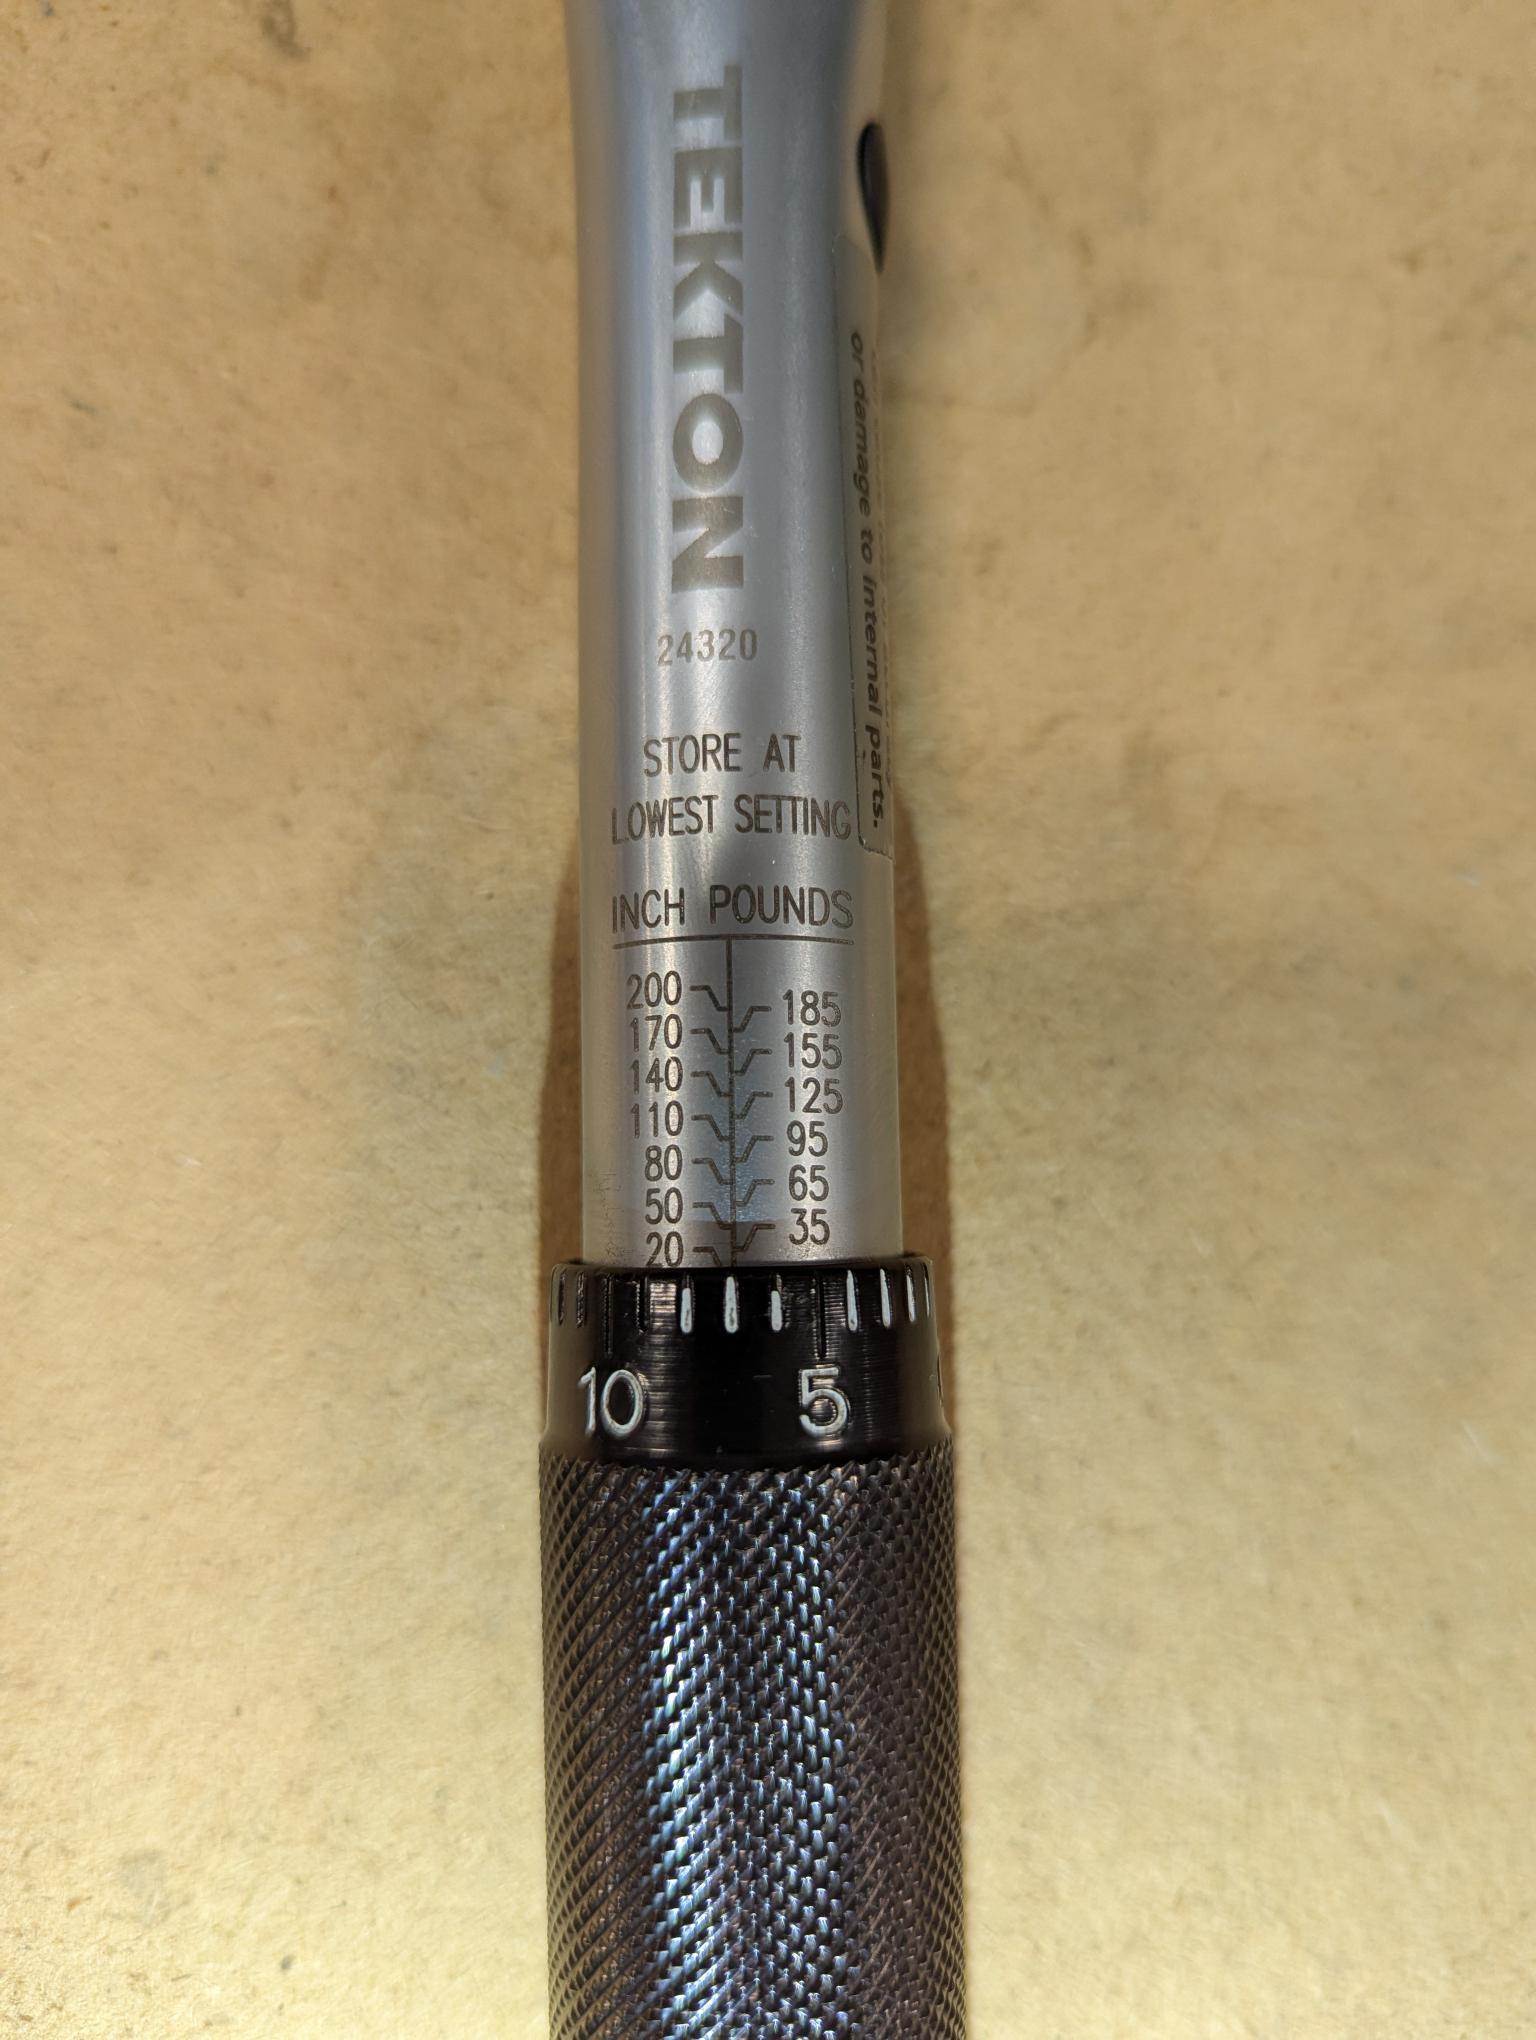
Torque ratchets can be a little confusing if you have never used one. Learn how to properly identify the dial to number position.
Here are a couple examples of torque settings.
The first example is set at 20 in.lbs.
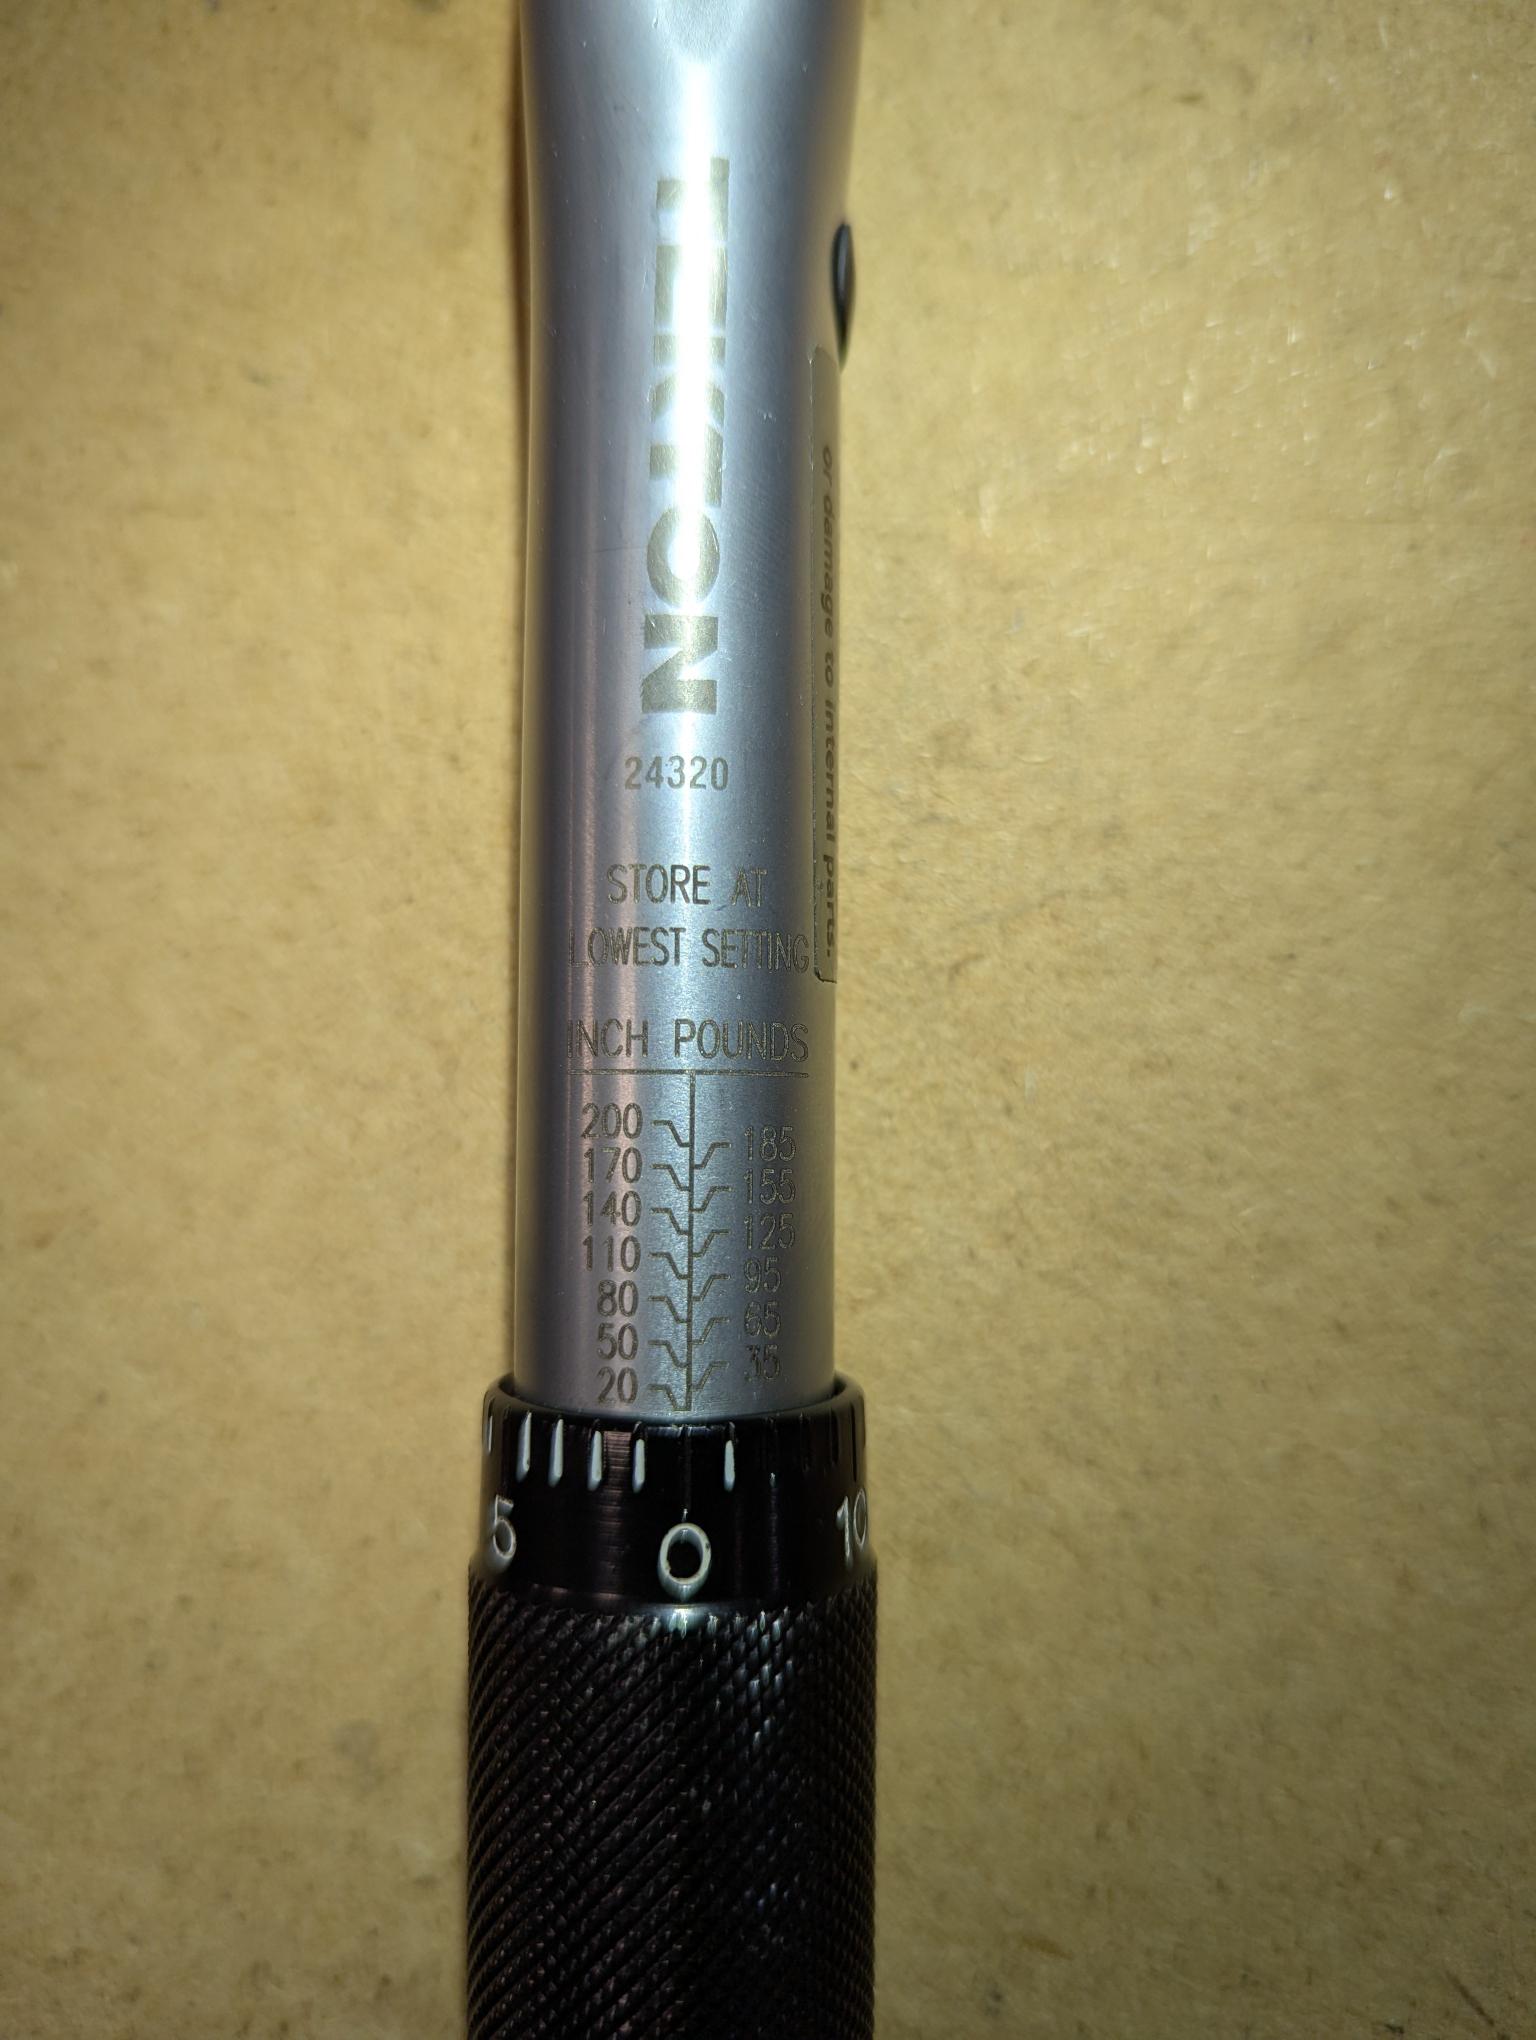
This second example is seta at 27 in.lbs.