
MachPro Jogging Increments & Pendant Info
{{@2007#bkmrk--1}}
Starting Principles
Configure the velocity and acceleration for each motor before working on pendant settingssettings. Refer to your motion control manual in the axis calibration settings.
- Set the maximum velocity as high as the motor and mechanics can safely run without excessive wear on the machine.
- Rapid rates (motor maximum velocity) can reduced with the screen controls.
- If velocity is too low, the pendant can outrun the motor maximum velocity
- Acceleration is set for each motor and it affects all motion on that motor - rapid moves and feed rate moves.
- Acceleration that is too low will increase cycle times per part
- Acceleration that is too high will create rigid, shaking, rough motion.
- The primary function of the machine is production, and jogging needs to work within the production settings.
Adjusting Pendant Acceleration
This is not changing the motors' acceleration values. This is adjusting the pendant acceleration. To access the pendant acceleration settings:
- Disable MachPro
- Pull down Configure -> Control
- Select the Settings tab
- Collapse the settings tree

- Expand the Jogging section.


In the (Manual Pulse Generator) MPG section, you can enter values between 1-100. YouAdjust X1 first, then X10. These are for precise movements and you should testsee theaccurate motion with no coasting. Adjust X100 last. This is for long distance jogging withand you may have some coasting in this increment. Coasting is when you stop spinning the pendant wheel, but the axis continues to makemove. sureNote that the control will complete all of the movement that the pendant sends - no matter how long it takes.
- If the axis accelerates rigidly, shakes, or vibrates; the acceleration is
joggingsetsmoothlytoonhigh - If
increments.the axis coasts, the acceleration is set too low

Adjusting Jog Increments
To access the pendant jog increment settings:
- Disable MachPro
- Pull down Configure -> Control
- Select the General tab
|
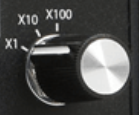
The pendant has three jog increment positions: X100, X10 and X1. The distance the machine will jog at each setting is determined by the values in the bottom 3 fields in both the inches and metric sections.
|
|
This screen sets the values for all jogging increments: inches and metric, pendant and on-screen
Using the values in this example:
If a position has a 0 then it will not be cycled through the jog increments for on-screen jogging.
On some systems, X100 is too fast and only X10 and X1 are needed. In that case set the X100 and X10 values the same 0.001 (inches) or 0.01 (metric).
|
|
To use the different jog increments with on-screen jogging:
|


Note: The pendant will send pulses to the control, and all those pulses will be completed - even if it takes several more seconds. It appears to be coasting, but it is really completing the motion you commanded.
This is more visible on an axis with a low velocity.
X100 is most likely to be a problem. Set it to the same value as X10 to reduce the speed that the pendant sends pulses.
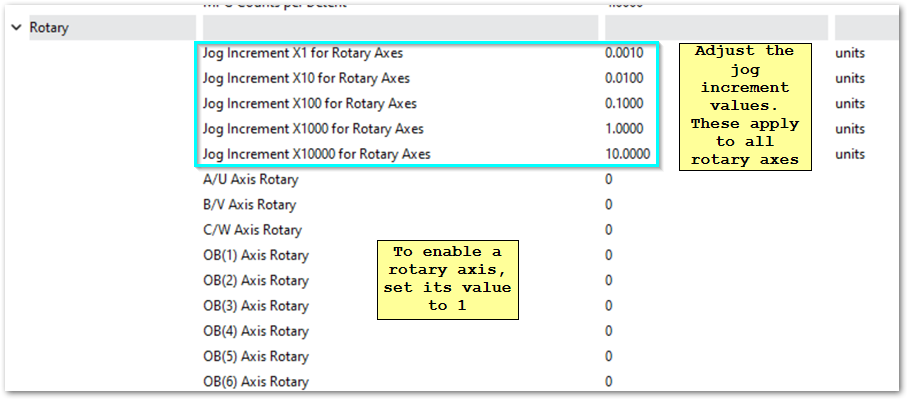
Rotary Increments
- Disable MachPro
- Pull down Configure -> Control
- Select the Settings tab
- Collapse the settings tree
- Expand the Jogging section.
- Work in the Rotary sub-section
Reverse MPG Pendant Direction
- Wired Pendant:
- In the User Interface tab of the MachPro Plugin, select the wired pendant in the list of active controllers, then set the Invert encoder checkbox (check the box if unchecked, uncheck if checked)
- Wireless Pendant:
- To enable the reverse, you need to add a key to the machine.ini file.
- Under the section for the MPG (eg. [ExternalController#]), add the field:
ReverseEncoder=1 - Note: The ExternalController # will depend on the setup location in the plugin list for the user interfaces.
{{@2016}}